Table of Contents
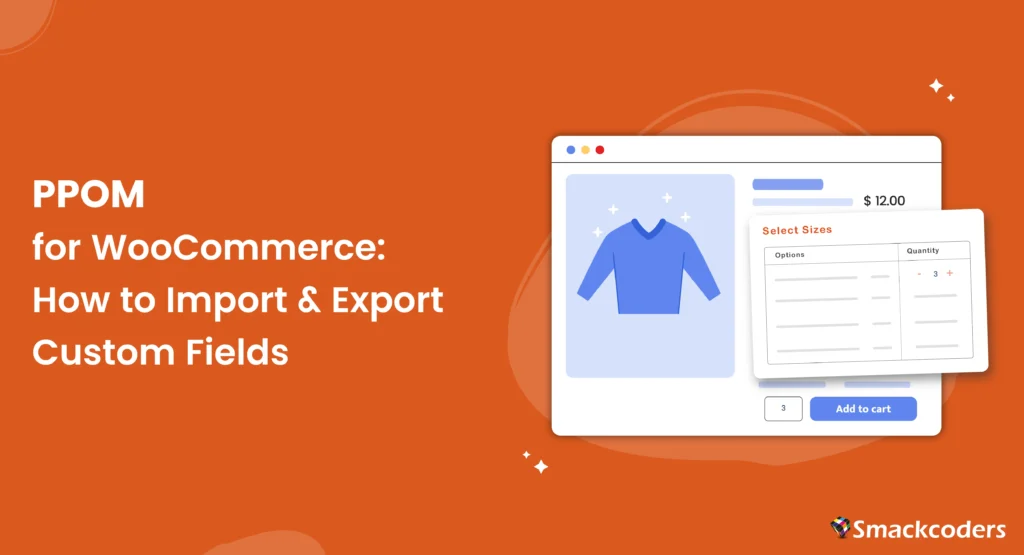
PPOM, short for Personalized Product Option Manager, is a WooCommerce plugin that lets you add custom input fields to your product pages including text boxes, dropdowns, file uploads, color pickers, date fields, and more. Customers fill these in before adding a product to their cart, which means every order can carry exactly the personalization details you need to fulfill it.
Where things get complicated is when you are managing a large product catalog or processing high volumes of orders with custom field data attached. Manually handling that at scale is not realistic. That is where WP Ultimate CSV Importer comes in. It lets you import and export PPOM fields from WooCommerce orders in bulk, which turns what would otherwise be hours of manual work into a process that takes minutes.
This guide covers the full workflow. How to set up custom product fields using the PPOM plugin, how to import PPOM field data into WooCommerce orders using a CSV file, and how to export order data with all associated PPOM fields intact.
PPOM Plugin for WooCommerce – An Introduction
PPOM, which stands for Personalized Product Option Manager, is a great addition to your WooCommerce store, especially if you want to provide personalized product choices for your customers. It includes input field types like text, textarea, select options, radio options, checkbox, date, email, number, and hidden fields. The premium version of PPOM offers even more custom field options, such as audio/video, color picker, date range, file upload, font picker, image options, radio switcher, bulk quantity, and more. In total, you can add up to 40 custom fields to a product to enhance its customization.
PPOM is the perfect solution, if you run a print-on-demand store, sell custom jewelry, or offer any products that require customer input.
For instance, if you run a clothing brand, you could offer a text field option that allows customers to personalize the message on their t-shirts. This way, customers can enter the exact text they want to appear on the shirt, adding a unique, custom touch to their purchase.
Features of PPOM include:
The PPOM plugin is packed with features; below you’ll find the most notable ones:
- 40 custom input fields for product pages(text, images, file uploads, and more)
- Pricing variations based on user inputs
- Conditional logic to show/hide fields based on input
- Tooltip feature that enhances user understanding and experience
- Multilanguage compatibility
- Add customizable styles with CSS and functions with Javascript
- PPOM repeaters to clone a field group
- Compatibility with WooCommerce & WPML Currency Switcher
- Compatibility with Wholesale plugin and WooCommerce themes
- Bulk field creation for multiple products
- And much more.
Now, let’s dive into how to add custom fields for products using the PPOM plugin.
How to Add Custom Fields for Products with the PPOM Plugin
The PPOM plugin is also available in a free version. So install and activate the PPOM plugin from your WordPress dashboard by navigating to Plugins > Add New, and searching for “PPOM for WooCommerce”.
After you’ve added it, you can find it listed under the WooCommerce menu. Here you need to create a new product field group with all the required fields.
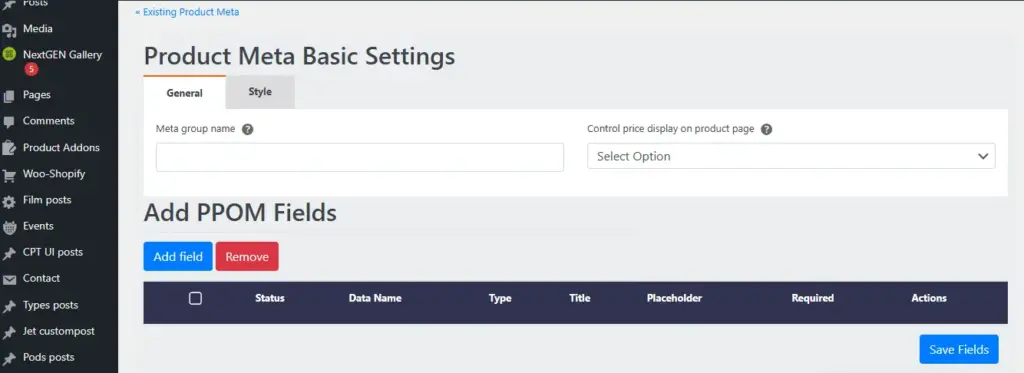
Click the Add New Group button in green color. It takes you to a new page where you can create new fields under a new field group. This allows you to group multiple fields that will be associated with a particular product.
Start adding by providing a group name and you can configure here how the price table should be displayed in product pages. Now begin adding custom fields. Click the Add Field button and add fields to the group.
PPOM offers a range of input types like text boxes, dropdowns, color pickers, and file uploads. Select the fields that best suit your product customization needs. While you configure fields you can set up conditions for showing or hiding the field based on user input. Finally, save the fields you’ve added to the group.
Assign the field group to a product:
After configuring the custom fields, now you need to assign the field group to specific WooCommerce products.
In the PPOM’s field group edit view, you can find a button named ‘Attach to Products’. Choosing it will open a popup window that lets you configure adding the field group to products. Choose multiple products from the dropdown, or if you want to add this field group to categories, you can assign that too here.
Click save, and the field group will be added to that product. Now, customers will be able to fill in these details on the product page before adding items to their cart.
How to Import PPOM Fields with WP Ultimate CSV Importer
WP Ultimate CSV Importer can handle the import and export of PPOM fields. For now, the compatibility is added only for the PPOM free version. It supports all the free version input field types. Below you’ll find the steps to import and export PPOM fields stored in WooCommerce Orders.
For importing PPOM fields, you first begin with preparing an import file in any format like CSV or XML. The import file must include all the WooCommerce Order fields and PPOM fields associated with that product.
Install the WP Ultimate CSV Importer plugin. Visit the plugin page from your WordPress dashboard by navigating to WP Ultimate CSV Importer > Import/Update.
Upload your prepared import file like a CSV file. You can drag and drop fields from your computer or upload them from any preferred location type. Select the file that contains your PPOM fields and WooCommerce product data.
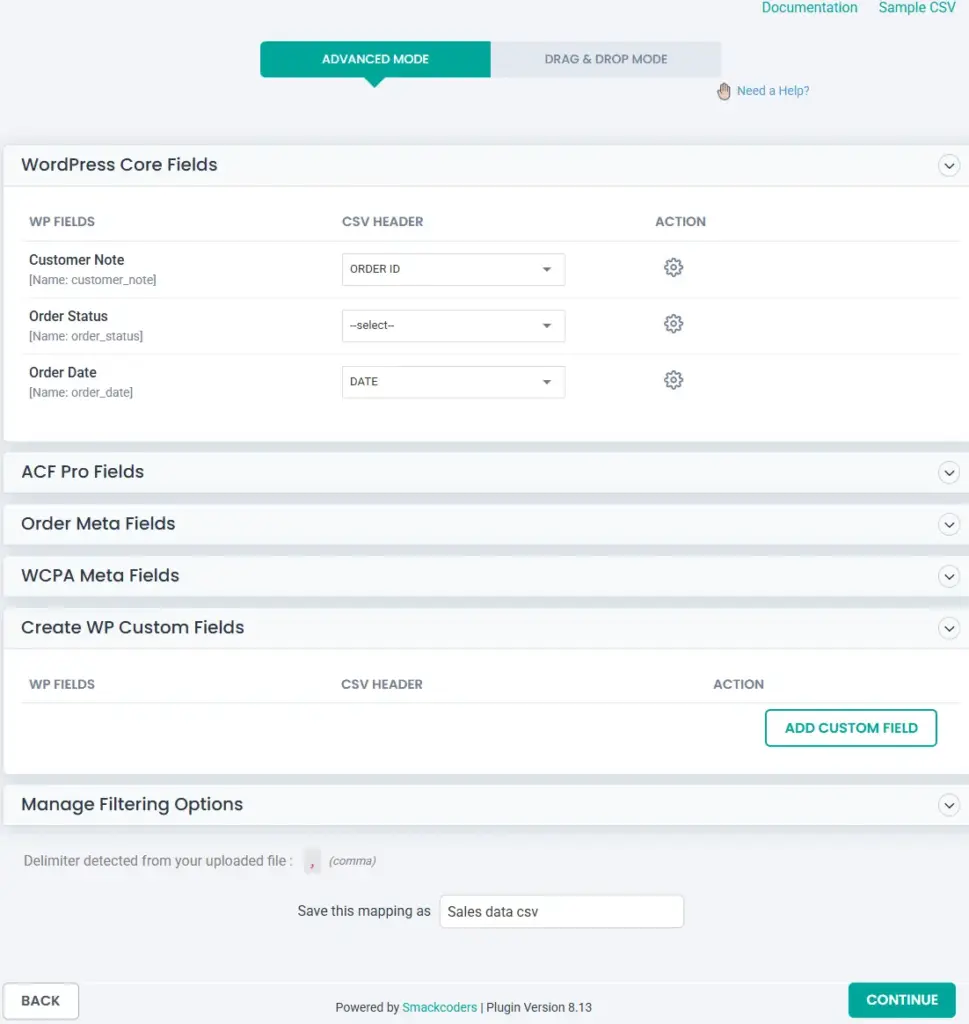
The next part is to map your fields. WP Ultimate CSV Importer provides an intuitive drag-and-drop interface where you can map the columns from your import file to the corresponding WooCommerce fields, including PPOM custom fields.
Once the mapping is complete, initiate the import by clicking the Import button. WP Ultimate CSV Importer will handle the rest, importing your PPOM fields and linking them to the appropriate WooCommerce products.
How to Export PPOM Fields from WooCommerce Orders:
Exporting PPOM fields from orders is just as easy with WP Ultimate CSV Importer. Navigate to WP Ultimate CSV Importer > Export section. Choose the WooCommerce Orders module as the post type to export.
Include the file name and choose the file type. You can also go for custom export using the Advanced filter feature. You can learn more about custom export with advanced filters here.

Otherwise, if you want to export all data, just click Export. The export will be started and completed quickly. You will see a Download button. Clicking it will download and save the file in your local. Open the file to verify if it includes the order data along with the associated PPOM fields.
This export feature ensures that you can easily manage orders that involve custom product options and retain all personalized details when needed.
Feedback or Suggestions
We’re always improving our plugins to make your WooCommerce store management smoother and more efficient. If you have any suggestions or feature requests for WP Ultimate CSV Importer, feel free to reach out to us. We’d love to hear your feedback!
Download the Free Plugin
The above feature we’ve discussed is available in our free plugin. Download WP Ultimate CSV Importer free today and start importing and exporting custom fields for WooCommerce products, orders, and more.
Frequently Asked Questions:
1. What is the full form of PPOM?
PPOM stands for Personalized Product Option Manager. If you have ever bought something online and had to enter a custom message, pick a color, or upload a file before checking out, there is a good chance something like PPOM was running behind the scenes. It gives WooCommerce store owners a way to collect that kind of input from customers directly on the product page.
2. How do I add product addons with WooCommerce?
PPOM is built exactly for this. Once you install and activate it, you create a field group, add whatever input types you need, text, dropdowns, file uploads, date pickers, and then attach that group to the products where you want those fields to appear. Customers see the fields on the product page and fill them in before adding to cart. The whole setup takes about ten minutes the first time through.
3. How do I automatically import products into WooCommerce?
Get your product data into a CSV file first, making sure the column headers match what WooCommerce expects. Then go into WP Ultimate CSV Importer, upload the file, and map your columns to the right fields. If your product data changes regularly, the scheduled import option handles the whole thing on autopilot so you are not repeating the process manually every time new data comes in.
Wrapping Up
If your store sells products that need customer input before checkout, PPOM takes care of that side of things cleanly. And once those orders start coming in with custom field data attached, having a way to handle that data in bulk rather than one order at a time makes a real difference when volume picks up.
That is the gap WP Ultimate CSV Importer fills here. Get both set up and the workflow largely runs itself.
Any questions about getting this working on your store? Drop us a line at [email protected] and we will get you sorted.
