Table of Contents
ACF taxonomies give you a level of content organization in WordPress that the default category and tag system was never built to handle. When your site needs structured classifications tied to custom fields, specific post types, or complex filtering logic, this is where you start.
The ACF plugin handles taxonomy creation, field group assignment, and term level data management entirely from the WordPress dashboard. No manual registration code, no custom database work. You define the taxonomy, attach your fields, and the data structure is ready to use across every post type you assign it to.
This guide walks through the complete ACF taxonomy workflow. Creating and configuring taxonomies, understanding how the acf-taxonomy post type works, assigning custom field groups to taxonomy terms, retrieving field values in your templates, and filtering content by taxonomy on archive pages. Every section includes working code examples and practical configuration steps built for real publishing environments in 2026.
What Is the ACF-Taxonomy Post Type?
When you create a taxonomy through the ACF plugin, WordPress registers it internally using a custom post type called acf-taxonomy. This is how ACF stores and manages taxonomy configurations in the database, the same way it uses acf-field-group to store field group definitions and acf-field to store individual field configurations.
You will not see acf-taxonomy listed in your WordPress admin menu as a regular post type. It operates in the background as a storage mechanism. Each taxonomy you create through ACF >> Taxonomies gets saved as a post in the wp_posts table with a post_type value of acf-taxonomy. The taxonomy settings, labels, slug, and associated post types are all stored as post meta against that record.
This matters in a few specific situations.
If you are querying the database directly or writing migration scripts, knowing that ACF taxonomy configurations live in wp_posts under post_type = ‘acf-taxonomy’ tells you exactly where to look. If you are exporting ACF configurations between environments, these records travel with your ACF JSON sync files. And if you ever see references to “acf-taxonomy” in code, error logs, or database queries, you now know precisely what that post type represents and why it exists.
One thing worth being clear about: acf-taxonomy is an internal ACF post type used for configuration storage. It is not the custom taxonomy itself. The taxonomy you create through ACF is registered as a real WordPress taxonomy and behaves exactly like any other taxonomy on your site.
The Importance of Custom Taxonomies
Before we dive into the steps for creating custom taxonomies with the ACF plugin, let’s take a moment to understand why custom taxonomies are valuable for your website. While WordPress offers built-in taxonomies like categories and tags, these might not always align with your specific requirements.
In such cases, custom taxonomies enable you to classify your content in a way that better suits your needs. They offer a structured organizational system and offer flexibility in categorizing your content based on your unique requirements.
How to Create Custom Taxonomies in WordPress
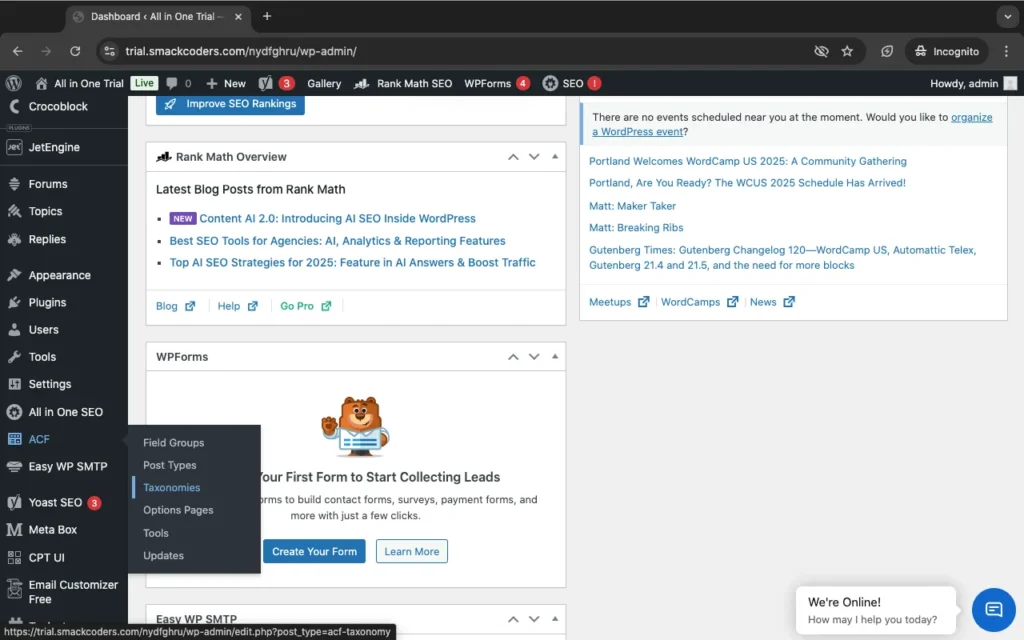
To begin creating custom taxonomies with ACF, make sure you have the plugin installed on your website. Once installed, you will see the ACF menu listed in the sidebar. Follow the steps below to get started:
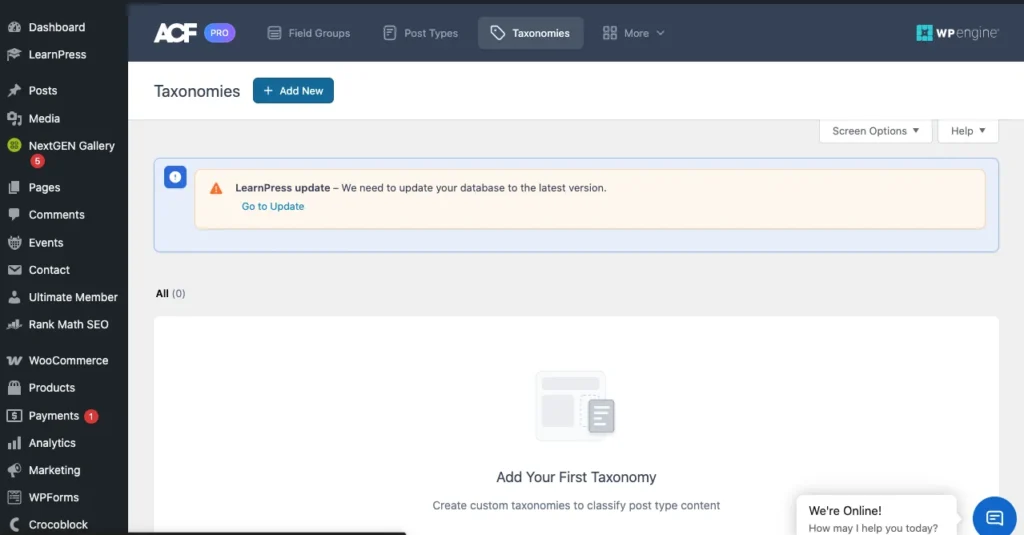
1. Navigate to ACF >> Taxonomies and click “Add New.” This will take you to the “Add New Taxonomy” page.
2. Fill in the required fields to configure the basic settings. Provide the plural label, singular label, and taxonomy key. The field for the taxonomy key is automatically generated based on the singular label, but you can edit it if desired.
3. From the “Post Types” field, select the post types to which you want to assign this custom taxonomy. You can choose multiple post types.
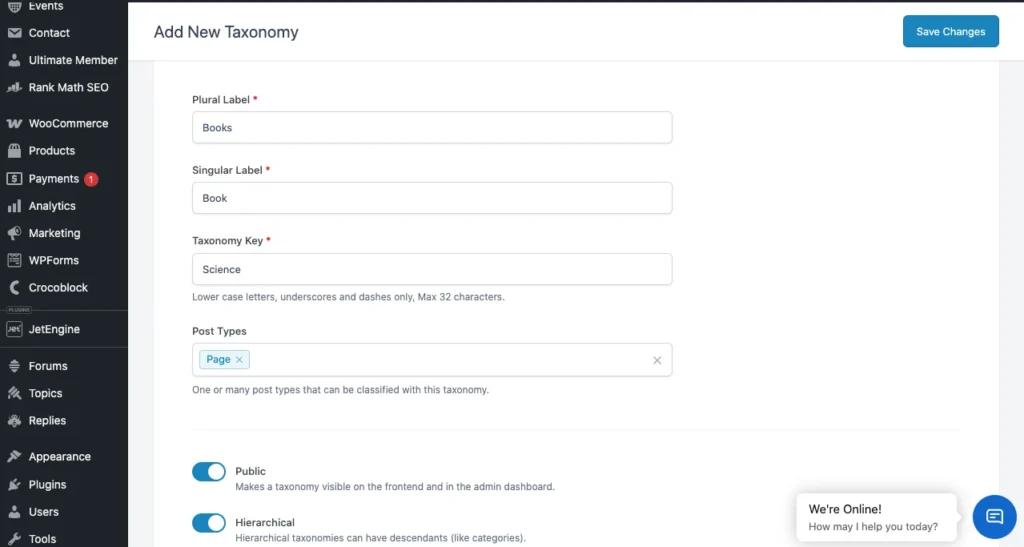
4. By default, the taxonomy will be visible on the front end. If you want the taxonomy to have a hierarchical structure, enable the “Hierarchical” toggle button.
Additional Settings Configuration
ACF makes configuring settings simple with additional settings that you can access by toggling the bar. Here’s a brief overview of the available tabs:
General: Enable the “Sort Terms” option to sort the taxonomy terms. If you have the default term enabled, provide the term name (mandatory), term slug, and term description. You can also provide a general description of the taxonomy. The “Active” toggle is enabled by default, but you can deactivate the taxonomy without deleting it.
Labels: Define the labels for the taxonomy, which will be used throughout the admin dashboard. The labels are automatically generated based on the singular and plural labels you configured in the basic settings, but you can edit them if necessary.
Visibility: Control the visibility of the taxonomies on the front and admin dashboards.
URLs, permissions, and REST API: These settings are preconfigured, but you can make changes based on your specific needs. For more detailed information, refer to the ACF official documentation on custom taxonomy.
Once you have configured the settings, click “Save Changes” to apply the custom taxonomy in ACF.
Adding Values to Custom Taxonomies
There are multiple ways to add value to a custom taxonomy. One option is to visit the “Add New” or “Edit” page of any record in the post type to which you assigned the custom taxonomy. You will find the custom taxonomy listed as a submenu below the post type’s submenus. For instance, if you assigned “CTax1” to the “Posts” post type, you will find a “CTax1” submenu listed below the “Posts” submenus. From there, you can create custom taxonomies.
Assigning Custom Fields to Custom Taxonomies
You can also assign a custom field group for WordPress to your custom taxonomy. To do this, follow these steps:
1. Go to ACF >> Field Groups and click on “Add New.”
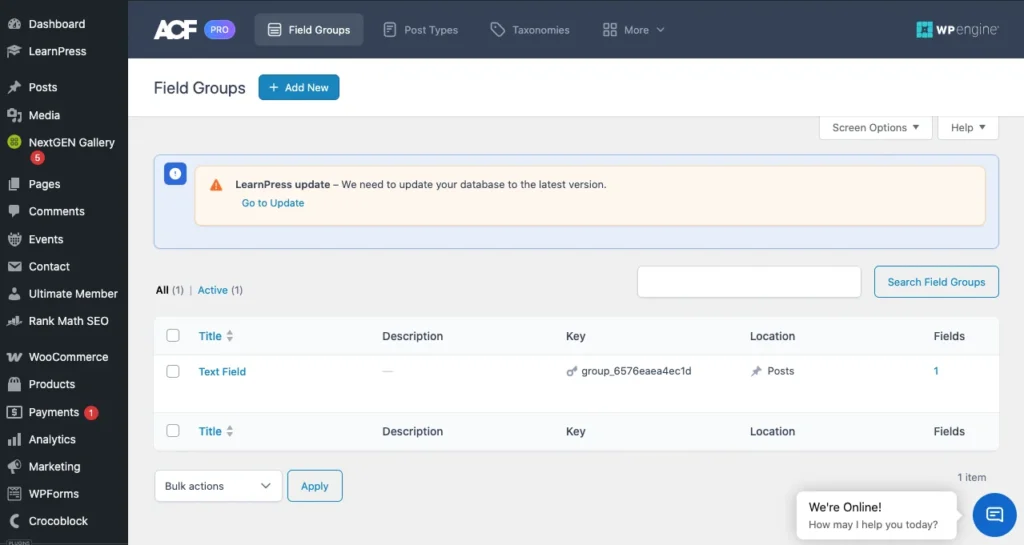
2. Provide a title for your field group.
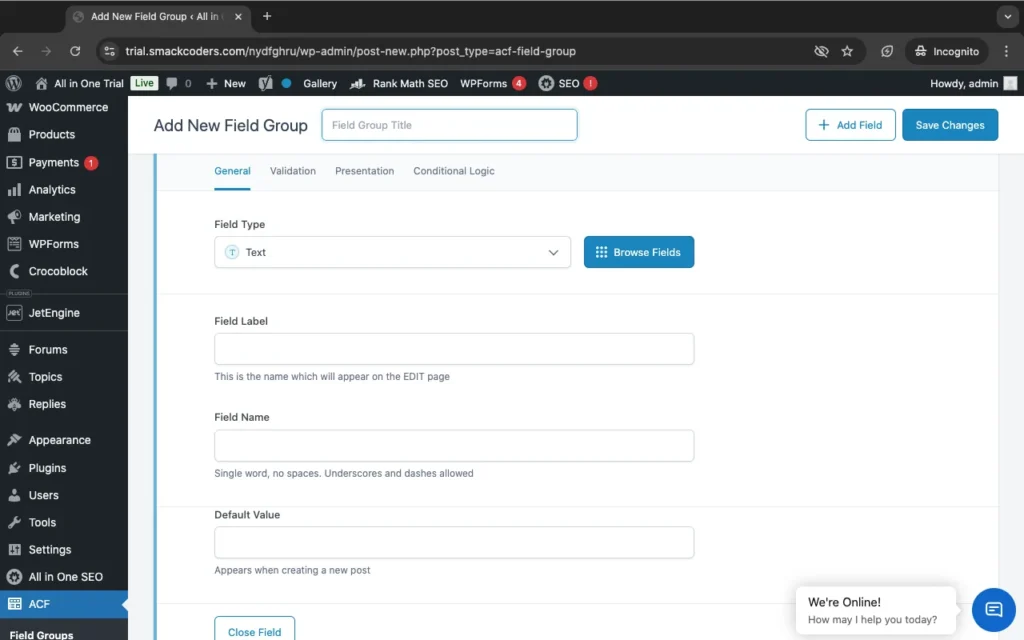
3. Add field types by selecting them from the drop-down menu. Enter the field label, field name, and default value.
4. In the “Settings” section, choose “Taxonomy” >> “is equal to” >> “your_taxonomy” from the drop-down menus.
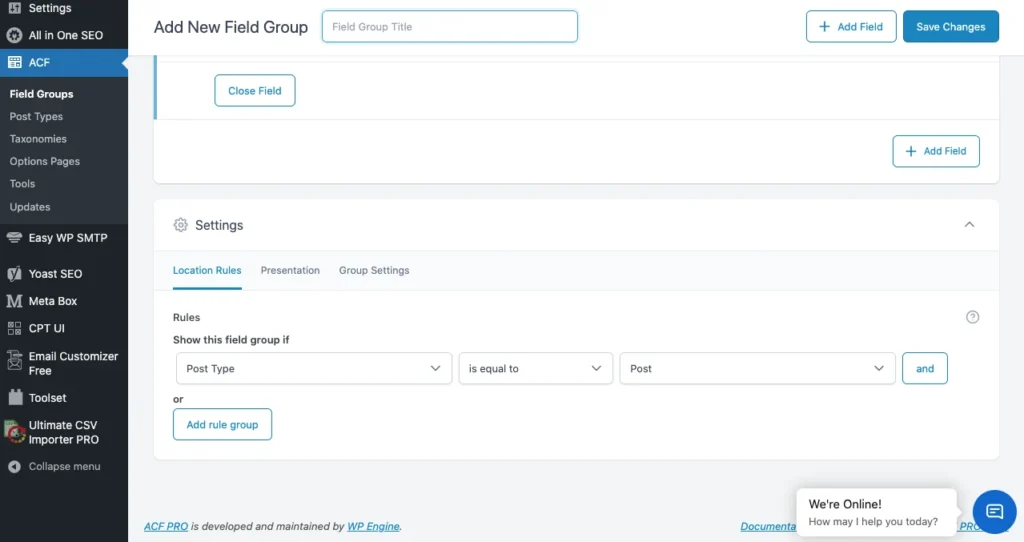
5. Click “Save Changes.”
Now, the custom fields you created will be assigned to your custom taxonomy, enhancing the flexibility and functionality of your website.
How to Get ACF Field Values from a Taxonomy Term
Retrieving ACF field values from a taxonomy term works differently from retrieving them from a post. Instead of passing a post ID to get_field(), you pass a term identifier that tells ACF exactly which taxonomy term the field is attached to.
The Basic Approach
When you are inside a taxonomy template like taxonomy.php or term.php, the current term is already available through get_queried_object(). Use that to build the term identifier and pass it to get_field():
php
$term = get_queried_object();
$field_value = get_field( ‘your_field_name’, $term );
ACF accepts the term object directly here. This is the cleanest approach when you are working inside a taxonomy archive template because WordPress has already queried the term for you.
Getting Field Values Outside a Taxonomy Template
When you need to retrieve ACF field values from a specific taxonomy term outside of a taxonomy template, pass the term ID with the taxonomy prefix directly:
php
$term_id = 12; // Replace with your actual term ID
$field_value = get_field( ‘your_field_name’, ‘category_’ . $term_id );
The prefix before the term ID changes based on the taxonomy. For a custom taxonomy called genre the identifier would be genre_ followed by the term ID. For the built-in categories taxonomy it is category_ followed by the term ID.
Getting a Taxonomy Image Field
Retrieving an image field attached to a taxonomy term follows the same pattern. Pass the term identifier and handle the returned image array:
php
$term_id = get_queried_object_id();
$image = get_field( ‘taxonomy_image’, ‘category_’ . $term_id );
if ( $image ) {
echo ‘<img src=”‘ . esc_url( $image[‘url’] ) . ‘” alt=”‘ . esc_attr( $image[‘alt’] ) . ‘”>’;
}
If your image field is set to return a URL instead of an array, skip the array key and use the value directly:
php
$image_url = get_field( ‘taxonomy_image’, ‘category_’ . $term_id );
if ( $image_url ) {
echo ‘<img src=”‘ . esc_url( $image_url ) . ‘” alt=””>’;
}
Looping Through All Terms and Getting Field Values
When you need to output ACF field values for every term in a taxonomy, get_terms() gives you the full list and you can pull the field value for each one inside the loop:
php
$terms = get_terms( array(
‘taxonomy’ => ‘genre’,
‘hide_empty’ => false,
) );
if ( ! empty( $terms ) && ! is_wp_error( $terms ) ) {
foreach ( $terms as $term ) {
$field_value = get_field( ‘your_field_name’, $term );
echo ‘<p>’ . esc_html( $term->name ) . ‘: ‘ . esc_html( $field_value ) . ‘</p>’;
}
}
Using the_field() vs get_field() for Taxonomy Terms
Both functions work with taxonomy terms. The difference is output handling. the_field() echoes the value directly and is useful when you just need to display it. get_field() returns the value as a variable so you can run conditional checks, pass it to another function, or manipulate it before displaying.
For taxonomy terms use get_field() in most cases. Taxonomy templates often involve conditional logic around whether a field has a value before you do anything with it, and get_field() gives you that control cleanly.
Difference between Custom Fields and Taxonomies
In Advanced Custom Fields (ACF), both custom fields and taxonomies are used to extend the WordPress content management system by adding additional data fields to posts, pages, custom post types, or other content types.
Custom Fields:
- In ACF, you can define custom fields using its interface or functions that serve different purposes and are structured differently, and then assign them to specific posts or content types.
- Custom fields are individual pieces of data that can be attached to posts or other content types.
- They allow you to define specific data fields such as text, numbers, dates, images, files, etc., which users can then fill in when creating or editing content.
- Custom fields are typically used for adding additional information specific to each post or page, such as a product price, author bio, event date, etc.
Taxanomies:
- Taxonomies are a way of grouping and organizing content in WordPress.
- They classify content into different categories, tags, or custom hierarchical structures.
- Examples of taxonomies include categories (hierarchical), tags (non-hierarchical), and custom taxonomies (which you can define according to your needs).
- Like custom fields, Taxonomies are not individual data fields; instead, they represent broader classifications or relationships among content items.
- In ACF, you can create custom taxonomies and associate them with your custom post types, allowing you to organize and classify your content in a more structured way.
In summary, custom fields are used for adding specific data fields to individual posts or content items. However, taxonomies are used for grouping and organizing content into broader categories or classifications. Both custom fields and taxonomies can be powerful tools for extending the functionality and organization of your WordPress site, and they can often be used together to create rich and structured content experiences.
How to filter posts by custom fields and custom taxonomies on archive pages?
To filter posts by custom fields and custom taxonomies on archive pages using Advanced Custom Fields (ACF) in WordPress, you’ll need to use custom queries to modify the main WordPress loop. Here’s a step-by-step guide to achieving this:
- Create Custom Fields and Taxonomies: First, ensure you have created your custom fields and taxonomies using Advanced Custom Fields. You can create custom fields for posts using ACF’s interface, and you can register custom taxonomies using code in your theme’s functions.php file.
- Modify the Main Query: In your theme’s functions.php file or a custom plugin, add a filter to modify the main WordPress query on the archive pages where you want to apply the filtering. You’ll use the pre_get_posts action hook for this purpose.
php
function custom_archive_query( $query ) {
if ( $query->is_archive() && $query->is_main_query() ) {
// Modify the query as per your requirements
// Example: Filter posts by custom field ‘custom_field_name’
// $query->set( ‘meta_key’, ‘custom_field_name’ );
// $query->set( ‘meta_value’, ‘desired_value’ );
// Example: Filter posts by custom taxonomy ‘custom_taxonomy_name’
// $query->set( ‘tax_query’, array(
// array(
// ‘taxonomy’ => ‘custom_taxonomy_name’,
// ‘field’ => ‘slug’,
// ‘terms’ => ‘desired_term’,
// ),
// ));
}
}
add_action( ‘pre_get_posts’, ‘custom_archive_query’ );
- Uncomment and Customize: Uncomment and customize the lines within the custom_archive_query function to filter posts by your custom fields and taxonomies. Replace ‘custom_field_name’, ‘desired_value’, ‘custom_taxonomy_name’, and ‘desired_term’ with the appropriate values from your ACF setup.
- Save Changes and Test: Save your changes to functions.php or your custom plugin file, and then visit the archive pages where you’ve applied the filtering. Ensure that the posts are being filtered according to your custom fields and taxonomies.
By following these steps, you’ll be able to filter posts by custom fields in WordPress archives and taxonomies on archive pages using ACF in WordPress.
How to retrieve taxonomy images using Advanced Custom Fields?
Below are the steps to get an ACF (Advanced Custom Fields) taxonomy image:
- Create a Taxonomy Field:
First, you need to create a taxonomy field in your ACF field group. When creating the field, make sure you select the “Taxonomy” field type.
- Assign the Field to the Appropriate Taxonomy:
After creating the taxonomy field, assign it to the desired taxonomy (e.g., categories, tags, or a custom taxonomy you’ve created).
- Set Up the Field for Image Selection:
Within the field settings, ensure that you’ve set it up to allow image selection. You can do this by choosing the appropriate field type (e.g., Image or File) and configuring any other settings as needed.
- Retrieve the Image in Your Template:
Once your field is set up and content has been assigned, you can retrieve the image associated with the taxonomy term in your template files.
You can retrieve the taxonomy field value using ACF’s get_field() function. Pass the name of the field and the taxonomy term ID.
For example
php
$image_id = get_field(‘taxonomy_image’, ‘category_’ . get_queried_object_id());
$image_url = wp_get_attachment_image_url($image_id, ‘full’);
Display the Image:
Once you have the image URL, you can use it to display the image in your template using HTML or any other markup you prefer. For example,
php
if ($image_url) {
echo ‘<img src=”‘ . esc_url($image_url) . ‘” alt=”Taxonomy Image”>’;
}
Replace ‘taxonomy_image’ with the actual name/key of your ACF taxonomy field and ‘category_’ with the appropriate prefix for your taxonomy (e.g., ‘category_’, ‘post_tag_’, or ‘your_custom_taxonomy_’).
By following these steps and using ACF functions like get_field(), you can easily retrieve and display the taxonomy image associated with your custom taxonomy terms in WordPress templates.
Modern Integration of ACF Custom Taxonomies with Gutenberg (WordPress 6.6+ & PHP 8.1+)
Modern Security Practices
1.Security: Nonces and Input Sanitization
When filtering posts via $_GET or $_POST (e.g., for AJAX or form submissions), always:
Use Nonces
Use wp_nonce_field() in forms and verify with check_ajax_referer() or wp_verify_nonce() on the server side:
// In your form
<?php wp_nonce_field(‘my_filter_action’, ‘my_filter_nonce’); ?>
// In your handler
if ( ! isset($_POST[‘my_filter_nonce’]) || ! wp_verify_nonce($_POST[‘my_filter_nonce’], ‘my_filter_action’) ) {
wp_send_json_error(‘Invalid nonce’);
}
Sanitize All Input
$category = isset($_GET[‘category’]) ? sanitize_text_field($_GET[‘category’]) : ”;
$post_id = isset($_GET[‘post_id’]) ? absint($_GET[‘post_id’]) : 0;
For arrays or nested values:
$filters = isset($_GET[‘filters’]) ? array_map(‘sanitize_text_field’, (array) $_GET[‘filters’]) : [];
2. Use acf_get_field() Instead of get_field_object()
ACF 6+ recommends using acf_get_field() for performance and clarity:
$field = acf_get_field(‘custom_field_name’);
This returns the field configuration without loading post meta, making it more efficient when you only need settings, choices, or labels.
3. Taxonomy Images or Metadata
If you’re getting taxonomy images (e.g., with ACF), you should avoid global functions and use term IDs directly with sanitized input:
$image_id = get_field(‘taxonomy_image’, ‘category_’ . absint($term_id));
$image_url = wp_get_attachment_image_url($image_id, ‘medium’);
Always validate $term_id to avoid injection issues.
4. REST API Integration (ACF & Custom Fields)
ACF supports exposing fields via the REST API using the ACF to REST API plugin or natively if using ACF Blocks/JSON.
Make sure fields are registered correctly:
add_filter(‘acf/rest_api/field_settings/show_in_rest’, ‘__return_true’);
Or expose specific fields manually in a custom endpoint:
register_rest_field(‘post’, ‘custom_acf_field’, [
‘get_callback’ => function($object) {
return get_field(‘custom_acf_field’, $object[‘id’]);
},
‘schema’ => null,
]);
5. Avoid Direct Database Queries for ACF/Taxonomies
Use native WP functions like get_posts(), get_terms(), and meta queries:
$args = [
‘post_type’ => ‘product’,
‘meta_query’ => [
[
‘key’ => ‘custom_field’,
‘value’ => sanitize_text_field($_GET[‘value’]),
‘compare’ => ‘=’
]
]
];
$query = new WP_Query($args);
6. Use acf_register_block_type() for Blocks
For Gutenberg support and REST-friendly integration:
acf_register_block_type([
‘name’ => ‘testimonial’,
‘title’ => __(‘Testimonial’),
‘render_template’ => ‘template-parts/blocks/testimonial.php’,
‘category’ => ‘formatting’,
‘icon’ => ‘admin-comments’,
‘supports’ => [‘align’ => false],
]);
Then access fields in the template like:
$name = get_field(‘name’) ?? ‘Default Name’;
Performance Optimization for Large Taxonomies
1. Use WP-CLI for Bulk Operations
Add 1,000 terms in seconds:
wp term create genre “Sci-Fi” “Fantasy” “Mystery” –porcelain
2. Cache Tax Queries with Transients
$cached_terms = get_transient(‘cached_genres’);
if (false === $cached_terms) {
$cached_terms = get_terms([‘taxonomy’ => ‘genre’, ‘hide_empty’ => false]);
set_transient(‘cached_genres’, $cached_terms, HOUR_IN_SECONDS);
}
3. Optimize tax_query
Avoid nesting OR + AND without indexed fields. Use IN instead of multiple OR clauses when possible:
‘tax_query’ => [
[
‘taxonomy’ => ‘genre’,
‘field’ => ‘slug’,
‘terms’ => [‘sci-fi’, ‘drama’],
‘operator’ => ‘IN’,
]
]
Multilingual Support (ACF + WPML/Polylang)
WPML + ACF Integration:
- Enable Translate for your custom taxonomy in WPML > Taxonomy Translation
- Ensure ACF fields for taxonomy terms are marked translatable in WPML settings.
WPML automatically detects ACF fields on taxonomy terms when properly configured.
Polylang:
- Register taxonomy with pll_register_string() if needed
- Use term translation functions:
$translated_term_id = pll_get_term($term_id, ‘fr’); // Get French version
Frequently Asked Questions (FAQ)
1. How do I get a custom taxonomy category name in WordPress?
To get the name of a custom taxonomy category in WordPress, you can use the get_queried_object() function combined with the ->name property. This is particularly useful when you are inside a taxonomy template (e.g., taxonomy.php) or when viewing a single post associated with a specific taxonomy term.
Here’s how you can do it:
php
$term = get_queried_object();
if ($term) {
$category_name = $term->name;
echo $category_name;
}
Explanation:
get_queried_object() retrieves the currently queried object, which in the context of a taxonomy template or a single post associated with a taxonomy term, will be the taxonomy term object.
We then check if $term is not empty (meaning we’re on a taxonomy page or post associated with a term), and if so, we retrieve the name of the term using $term->name. Finally, we echo or use $category_name as needed to display or use the name of the custom taxonomy category.
echo $term->name; // to show the name
echo $term->taxonomy; // to show the taxonomy
echo $term->slug; // to show taxonomy slug
You can place this code within your template file (taxonomy.php or single.php, for example) wherever you want to display the name of the custom taxonomy category. It will dynamically fetch the name based on the current context.
To display the data,
<?php $term = get_queried_object(); ?>
<h1 class=”category-title”><?php echo $term->name; ?><span class=”taxonomy-label”><?php echo $term->taxonomy; ?> (<?php echo $term->count; ?> articles)</span></h1>
<p class=”category-description”><?php echo $term->description; ?></p>
2. What is the difference between the_field() and get_field()?
In the Advanced Custom Fields (ACF) plugin for WordPress, both the_field() and get_field() are used to retrieve the value of a custom field that you’ve created.
However, they differ in how they handle the output:
the_field() directly outputs the field value with formatting, while get_field() retrieves the value as a variable for further processing. Choose the appropriate function based on whether you need to immediately output the field value or if you need to manipulate it first.
3. What could you do if the ACF Field does not show in WordPress Custom Taxonomy?
If the ACF Field does not show in WordPress Custom Taxonomy, ensure that the custom taxonomy is correctly registered in your theme or plugin code. The field group will only appear for taxonomies that are registered with WordPress. Also, ensure that the ACF plugin is installed and activated on your site. Without the ACF plugin, the field groups won’t function properly.
4. How do I display custom taxonomy terms in the Gutenberg block editor?
You can use ACF blocks or custom blocks built with JavaScript/React. Here’s the most common method using ACF blocks:
1. Add a Taxonomy Field via ACF to a block.
Field type: Taxonomy
Return format: Term Object
2. In your PHP render template, output the term data:
$term = get_field(‘my_taxonomy_field’);
if ($term && is_object($term)) {
echo esc_html($term->name);
}
Ensure ‘show_in_rest’ => true is enabled when registering the taxonomy to make it appear in Gutenberg.
5. Can I import taxonomy terms with WP Ultimate CSV Importer?
Yes, with WP Ultimate CSV Importer, you can import taxonomy terms (including hierarchical). Then associate them with posts, pages, and WooCommerce products. Assign ACF fields to taxonomy terms (Pro version required)
Steps:
– Prepare a CSV with columns like term_name, parent, slug, taxonomy, acf_field_1, etc.
– Map fields in the import UI.
– Run import and verify in Posts > Categories or the custom taxonomy admin.
6. How do I handle large taxonomy term imports?
When dealing with thousands of taxonomy terms, you can use WP-CLI for speed
wp term create genre “Thriller” “Romance” “Adventure”
Or batch your CSV imports (100-200 per batch).
To increase PHP limits in php.ini:
max_execution_time = 300
memory_limit = 512M
Use wp_suspend_cache_addition(true) if importing programmatically to reduce memory usage.
7. How do I secure custom taxonomy queries?
Security Checklist:
Sanitize User Input
$term_slug = sanitize_text_field($_GET[‘genre’]);
1. Validate Taxonomy Terms
if (!term_exists($term_slug, ‘genre’)) {
wp_die(‘Invalid term’);
}
2. Use current_user_can() for admin actions
if (!current_user_can(‘manage_categories’)) {
wp_die(‘Permission denied’);
}
3. Avoid SQL Injection
Never use raw $wpdb queries with unsanitized values. Use prepared statements or built-in functions like get_terms().
8. Can I use custom taxonomies with WooCommerce products?
Yes, WooCommerce supports custom taxonomies for the product post type. For
example:
register_taxonomy(‘brand’, ‘product’, [
‘label’ => ‘Brand’,
‘public’ => true,
‘hierarchical’ => true,
‘show_in_rest’ => true,
]);
You can use ACF to attach taxonomy fields to Brands. Then add filtering functionality via tax_query. Display brands on product templates using get_the_terms() or get_field() (for ACF)
Wrapping Up
ACF taxonomies give you a content organization system that actually matches how your site works rather than forcing your content into whatever WordPress provides by default. Once you understand how the acf-taxonomy post type stores configurations, how to attach field groups to taxonomy terms, and how to retrieve those field values in your templates, the whole thing clicks into place pretty quickly.
The steps in this guide cover everything from initial taxonomy setup to pulling field values in production templates. If you are working with large term datasets, the performance and security sections are worth revisiting before you go live.Need to import or export your ACF taxonomy data at scale? WP Ultimate CSV Importer handles taxonomy term imports with full ACF field support. Check the documentation or reach out to us at [email protected] if you run into anything specific to your setup.
